Keywords: Calibration, Curie Point, magnetic material, magnet, mass change, SDT
TA427
Temperature calibration of thermogravimetric analyzers can be accomplished using either melting point standards or magnetic transitions standards. The recommended approach for temperature calibration of a TA instruments TGA is the measurement of the deviation of a magnetic (curie point) transition temperature from the standard reference temperature. The measured deviation can be applied as a correction term to subsequent measurements.
In this technique, a curie standard material is placed in an empty, tared TGA pan located near a strong magnet. The material is then heated. At the Curie Temperature, the magnetic properties disappear and the reduced attraction for the magnet results in a sharp apparent weight loss or gain (depending on the TGA furnace design). This point (temperature) is sharp and reversible, and hence ideal for calibration. Specific description for this Curie Temperature calibration procedure is described below according to the type of TGA instrument.
TGA temperature calibration using curie temperature standards (TGAs without integrated electromagnet, i.e. Discovery TGA™ 55 and TGA 550)
- Prepare the TGA. Place a piece of Curie Temperature standard material (for example alumel) into a clean, tared TGA pan.
- Select the temperature calibration template from the calibration experiment setup page, which will consist on equilibrate at a temperature 100 °C below the onset of the literature Curie temperature of the material, and next heat the material at a heating rate that you select, to a temperature 100 °C above the literature Curie temperature. Make sure to perform this calibration using a heating rate and purge gas that will be used in subsequent experiments.
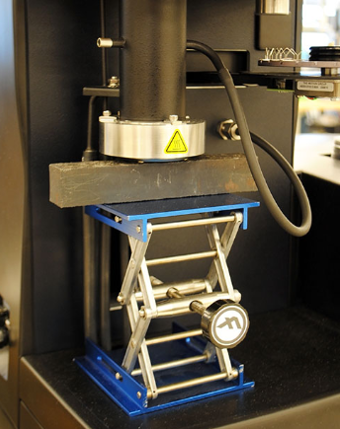
- Load the TGA pan and close the furnace. Start the calibration test and raise a bar magnet underneath the furnace (see figure 1) until a weight gain is detected. Secure the magnet in this position for the duration of the experiment.
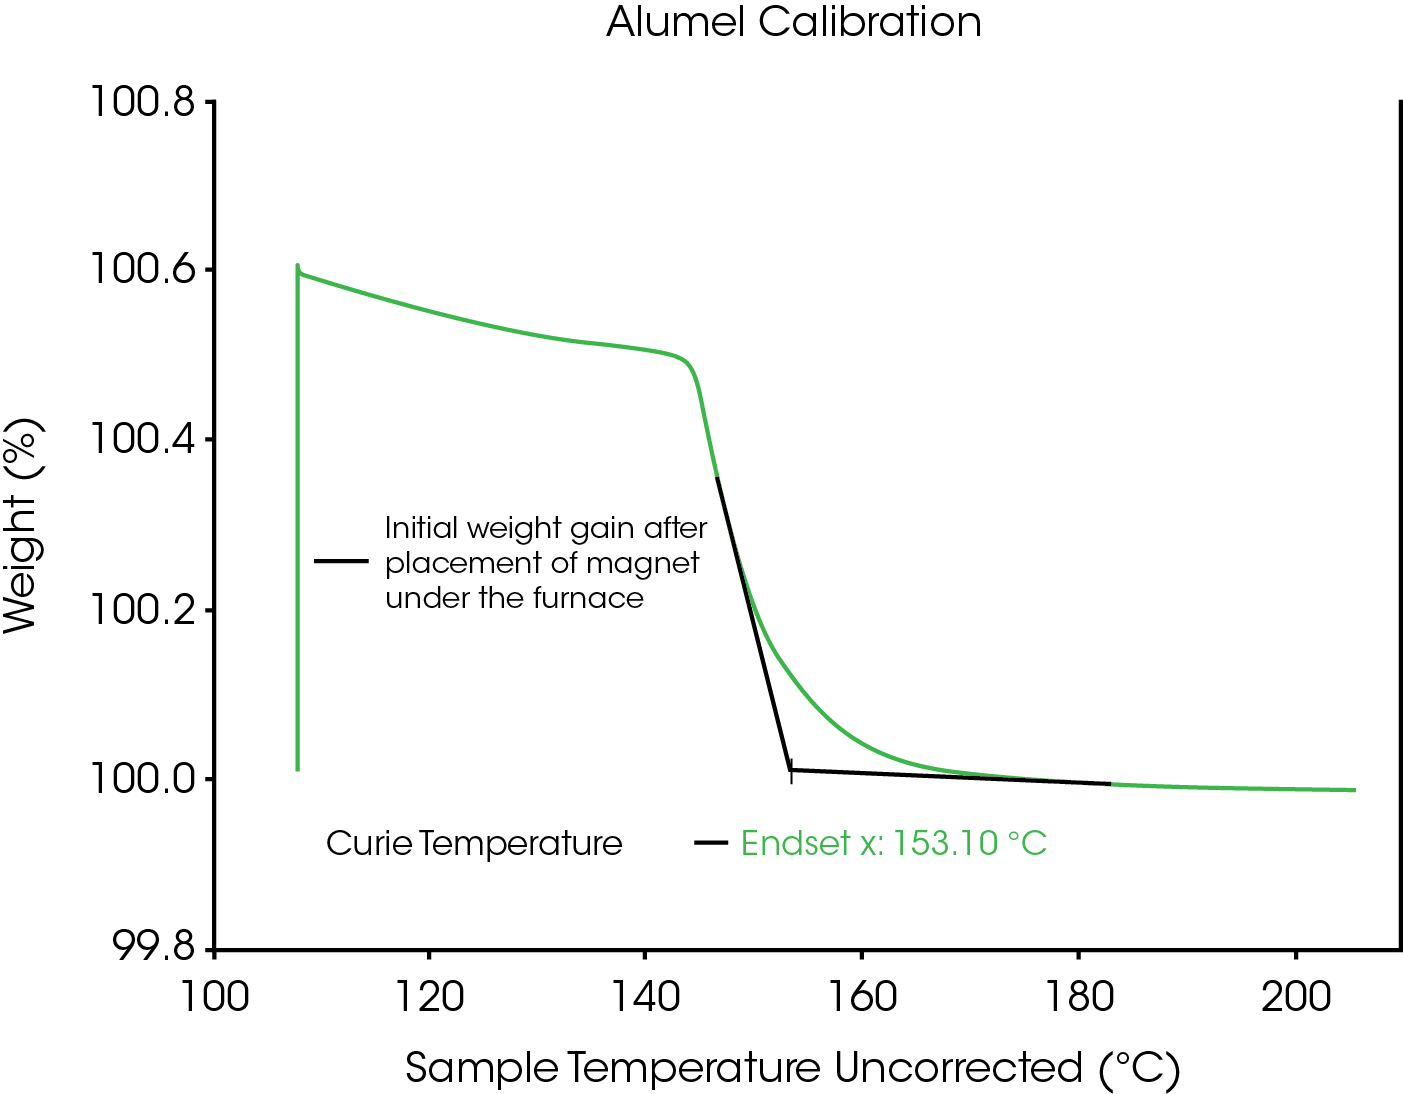
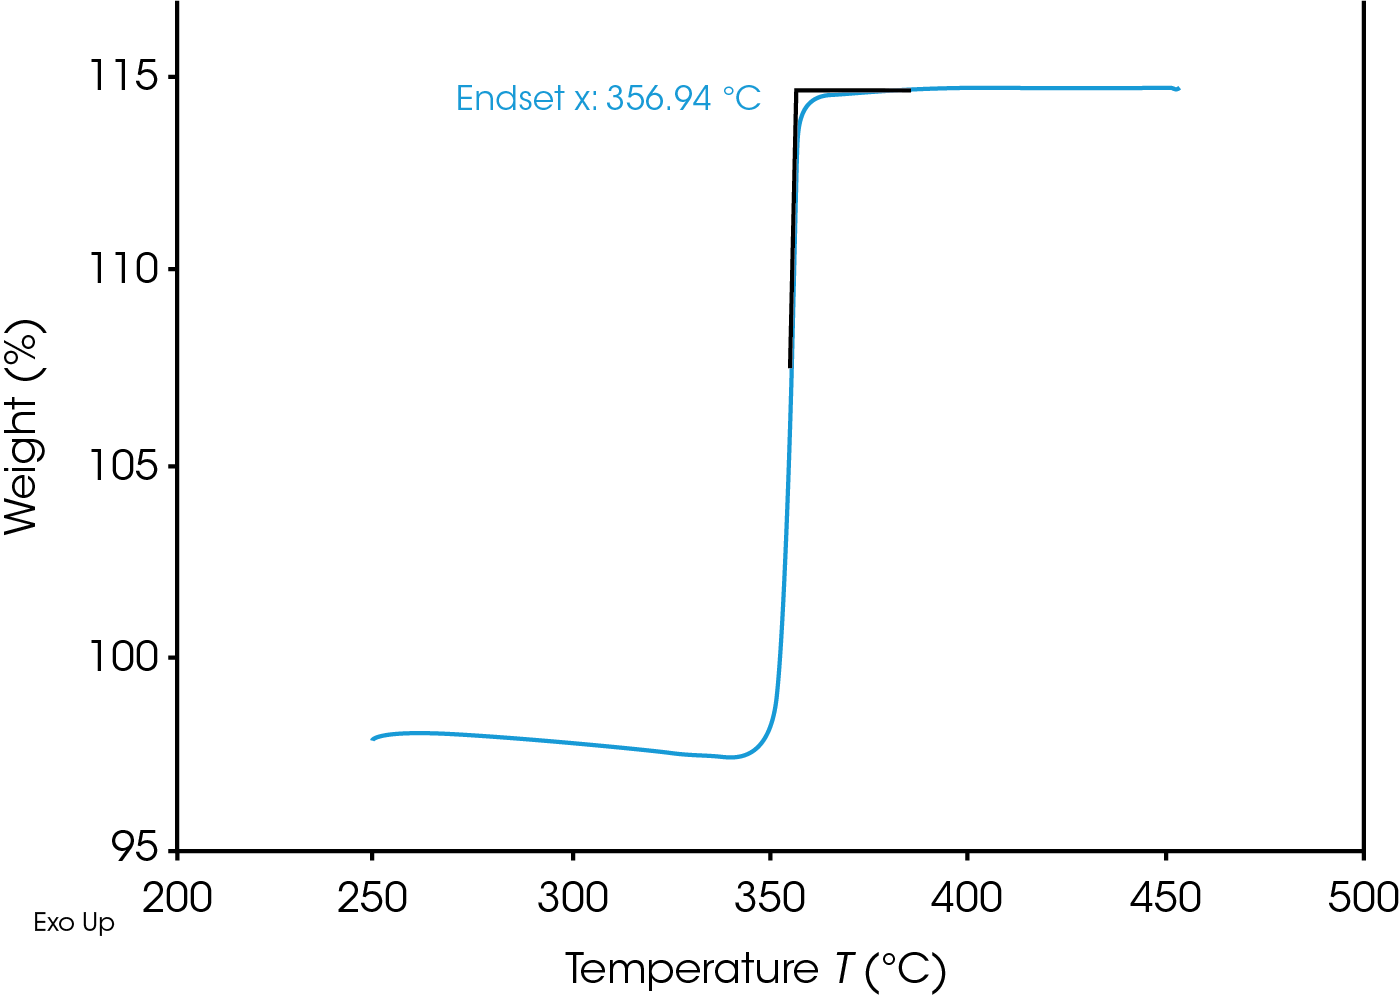
- When the test is complete, an “S” shaped curve will be observed. The curie temperature corresponds to the extrapolated endpoint of this “S” shaped curve. A typical curve is displayed in Figure 2.
- By conducting the calibration from the calibration setup page, the calibration file is run, analyzed and applied and the calibration results are found in the calibration data page.
Note: When the calibration test is in the running queue in the software, make sure to uncheck the “enable Air cool” option in the advanced settings, by doing this the furnace will not automatically open after cooling down to certain temperature during the post-test. Multiple calibration runs must be started manually since the autosampler sequencing is turned off to prevent the furnace from opening while the bar magnet is in place.
After the experiment is complete, remove the magnet so that the furnace may be lowered and the sample unloaded.
Discovery TGA™ 5500 (with Integrated electromagnet)
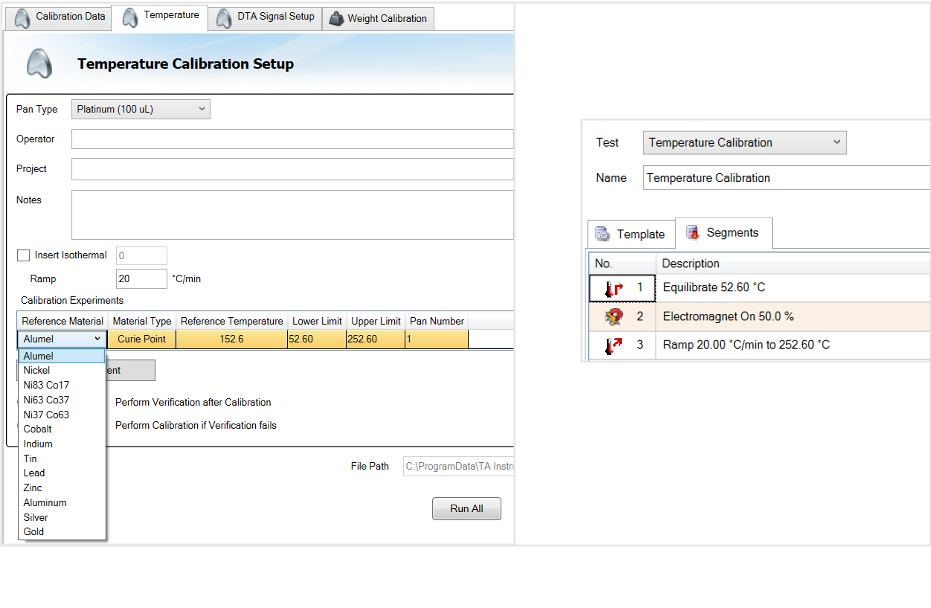
The TGA 5500 includes a magnetic coil surrounding the furnace that generates a field that acts on magnetic samples in the sample pan. This facilitates automated temperature calibration using the TRIOS software to activate the magnetic field instead of placing an external bar magnet underneath the furnace.
- Prepare the TGA. Place a piece of Curie Temperature standard material into a clean, tared TGA pan.
- Go to the TRIOS file manager calibration panel, select the temperature tab and set up the temperature calibration by choosing the reference material from the dropdown menu, the method will automatically generate. The calibration file is scheduled, run, analyzed, and applied. Multipoint calibration can also be scheduled and performed automatically if an autosampler is available (figure 3).
Discovery SDT™ 650
The Discovery SDT 650 is a simultaneous DSC-TGA. The recommended temperature calibration for this instrument consists of measuring the melting temperature of high purity metals. An alternative temperature calibration can be performed with Curie point transition materials. Details on the latter are listed below:
- Prepare the SDT. Place a piece of Curie Temperature standard material into a clean, tared SDT pan. Place the pan on the sample platform (or on the pan tray for units with an autosampler).
- Start heating the SDT using a method which heats at the same rate and under the same purge environment that will be used in subsequent experiments.
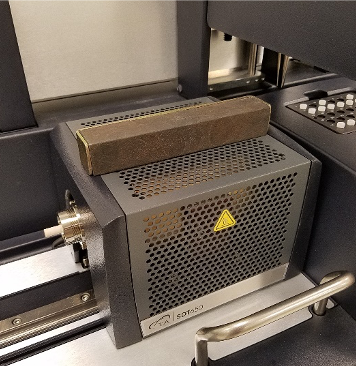
- Slowly lower a bar magnet down onto the furnace until a weight loss is detected. Maintain the magnet in this position for the duration of the experiment (refer to Figure 4).
- Continue heating until an “S” shaped curve is observed. The extrapolated endpoint of the S shaped curve corresponds to the curie point; a typical curve can be seen in Figure 5.
Note: Some Curie Temperature materials will oxidize and gain weight when an oxidizing purge environment is used.
Acknowledgement
Click here to download the printable version of this application note.

